|
|
|
Who's Online
There currently are 6043 guests online. |
|
Categories
|
|
Information
|
|
Featured Product
|
|
|
 |
|
|
There are currently no product reviews.
 ;
Great product, helped me to restore vintage walkman cassette.
Just some pictures could be little bit more sharp and contrast
Thank you
;
I love older radio's and the service manuals that are sometimes hard to find. Was able to find a manual quite easily on this site.
;
Thank you for your shop manual! Your help was very useful - the device is repaired! Once again - Thank you! I wish you a successful business! Edward (Russia).
;
It was a great experience,instead of purchasing a new Stereo Amplifier ,in just minutes i repaired my old one and that was thaks to the manual I have purchased from you.
Thanks again.
Samuel Alter
;
Das ging ja sehr unkompliziert hat bestens geklappt und die Quallität ist auch noch gut.
Vielen Dank dafür.
No.
Item
Measuring instruments & Input signals � IN MEGA chart (precisely scanned size) � Oscilloscope (H-rate)
Mode
Measuring point ( * ) Adjustment parts ( - ) Adjustment level ( + )
Adjustment procedure
2
Frequency response adjustment
� BARS swtch: � R Channel OFF * See Measuring Point � Menu No. 2A Table. LENGTH: - VR202 (R FREQ) 20 M [Main board] + Same levels of the 6 MHz section � G Channel * See Measuring Point Table. - VR302 (G LEVEL) [Main board] + Same levels of the 6 MHz section
6 MHz
1. Shoot the IN MEGA chart so that it becomes precisely scanned size. 2. Connect oscilloscope CH1 and CH2 as shown in the Measuring Point Table. 3. Adjust so that the levels of CH1 and CH2 of the 6 MHz sections are same levels.
4. Adjust in the same way as the R Channel.
CH1 Same level CH2
� B Channel * See Measuring Point Table. - VR402 (B LEVEL) [Main board] + Same levels of the 6 MHz section
2.6
INTERCOM LEVEL ADJUSTMENT
For intercom operation using headsets, the intercom levels can be adjusted with the following controls. � Camera : INCOM LEVEL control on the adapter at the rear. � RM-P210 : INTERCOM LEVEL control on the front panel. Although adjustments on the circuit board are usually unnecessary, perform the following adjustment if the amplification gain seems to be insufficient. 1 Side tone adjustment (Feedback of the microphone to the earphone of the same headset) Headset � S602: 2W [Main board] * INTERCOM jack on the 1. Connect 560 � resistance across H and C INRM-P210 front panel TERCOM terminals on the rear panel. - VR15 (2W S.TONE) 2. Plug the headset into the front panel INTER[Main board] COM jack. 3. Talk and adjust to optimize the side tone level. (Adjust it to the clockwise direction.)
2
RTS side tone RTS headset adjustment (U model only)
� S602: RTS [Main board]
* INTERCOM jack on the 1. Connect 220 � resistance across H and G INRM-P210 front panel TERCOM terminals on the rear panel. - VR16 (RTS S.TONE) 2. Plug the headset into the front panel INTER[Main board] COM jack. 3. Talk and adjust to optimize the side tone level. (Adjust it to the clockwise direction.)
2-5
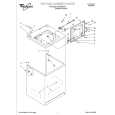
 $4.99 RM-P210E JVC
Owner's Manual Complete owner's manual in digital format. The manual will be available for download as PDF file aft…
|
|
|
> |
|